Process
Started fresh in Maya, added a polygon sphere and a flat plane to start with.
The first thing to do was to check that the settings was right. We have to set the frames per second (fps) and playback speed to 24 fps, or it will play extremely fast.
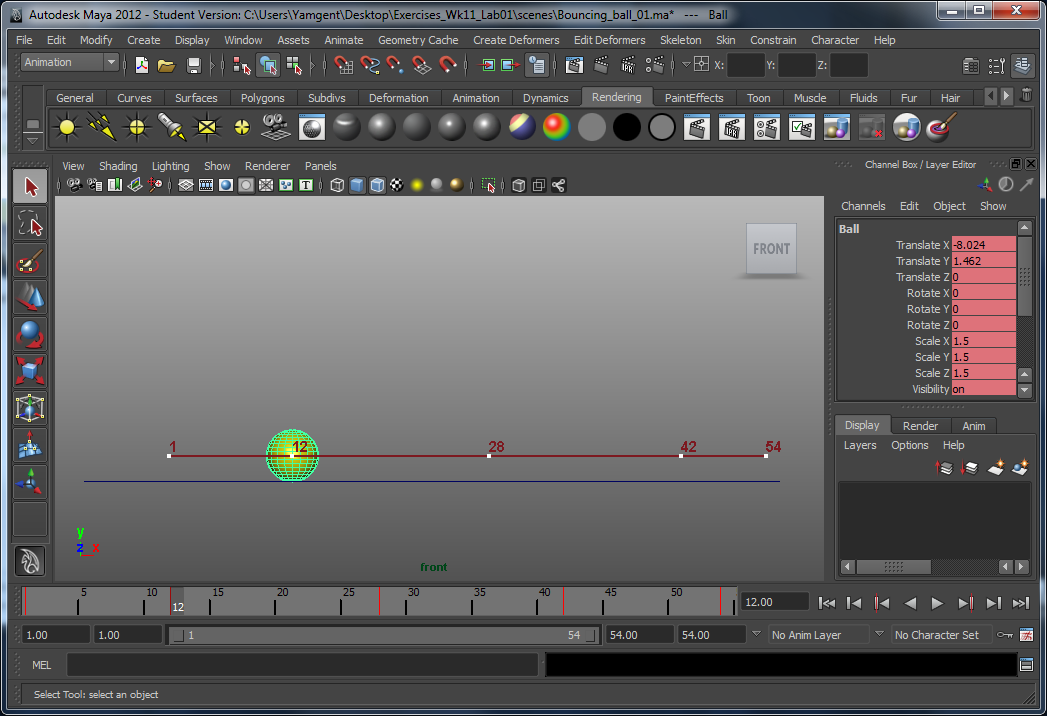
Next up... start setting up the keyframes. Using the ball bouncing animation in Pencil, I was able to set those keyframes at the proper time. I started tackling the extremes/poses on the bottom first...
Then I moved on to putting up the keyframes at the other extremes/poses at the top:

Now when the keyframes are set, the basic animation creation steps are completed. From here onwards it is better to modify the animation values using the graph editor.
The first thing that I notice when I played back the animation was that the ball was bouncing off the ground very unnaturally. This is because it lands on the ground in the curvy manner, which feels like the ball is braking as it approaches the ground, which feels weird. So this problem has to be solved in the graph editor.

Basically, we have to fix the tangents of the points selected above, so that it drops sharply to the floor, as opposed to braking as we land. Using the break tangents to separate the two tangents, and by using the Move tool (Q), I was able to make the curve look just the way I described and wanted:


Now that's done, I moved on to delete a few key frames that are no longer needed. One group of keyframes are the top extremes/poses. Basically, even without them, we can still make it curvy with the bottom points of the curve. For the translate X curve, which I haven't touch it yet, also have some extra points in the middle which was unnecessary, so it gets deleted anyway.


Next was to delete the static channels. Basically those channels are attributes that have a straight line throughout the whole animation, so they are pretty useless and a waste of processing power. So... they will get deleted! The blue and grey lines below are examples of static channels.

Now finally, the last thing that I am left to do is to actually replay the animation over and over again and spot areas that I can tweak and improve on. Although the curve above looks pretty perfect, I saw in my animations that there were still some problems:
- The speed in the X direction is the same throughout the animation. The ball loses kinetic energy over time, so the speed should be slower. Therefore, the red curve was tweaked to illustrate that.
- The height for the one of the top extreme/pose is wrong because it is higher than half the height of the previous one. The removing of the top keyframes meant that the curves' tangent had to be readjusted and therefore this problem popped up. Therefore, the tangents have to be moved to readjust the heights of the curve.
- The high points of the curve are in the middle of the curve... since the ball is slowing down I figured it would be better if the curves were slightly slanted towards the right side to further show the slowing down of the ball.
Eventually, I reached to the final version of the animation. This is the motion trail of the ball:

And a video that I created using Window > Playblast that shows the final animation!
Reflection
It was much easier to do the animation in Maya than drawing each individual pictures in Pencil. However, without the pencil animation, I think most of the time would be spent doing the timing of the ball bouncing, which can be quite frustrating especially if the model is complex and the processing speed is slow for any real-time edit-and-preview. Getting the timing right in Pencil meant that the only things we need to do in Maya was to make the bounce look more natural with correct spacing and fixing the tangents. The curves are given and drawn automatically by Maya, so we don't have to draw individual frames, but rather use and focus on certain poses, and every other frames would look right.
No comments:
Post a Comment