Step 1: Creating the Cube's Outline
Before I even begin to create anything, I decided that it is important to have my photos of the different views of the alarm clock to be imported into Maya first. Since this is the first time where there's no instructions telling you to set width to 13, set height to 5 and etc., I thought it will be kind of important to use the photos as a guide for my modelling. With the guide, I will roughly know how the model looks like from different sides of the alarm clock, and also not end up making the model appear out of scale and disproportional.
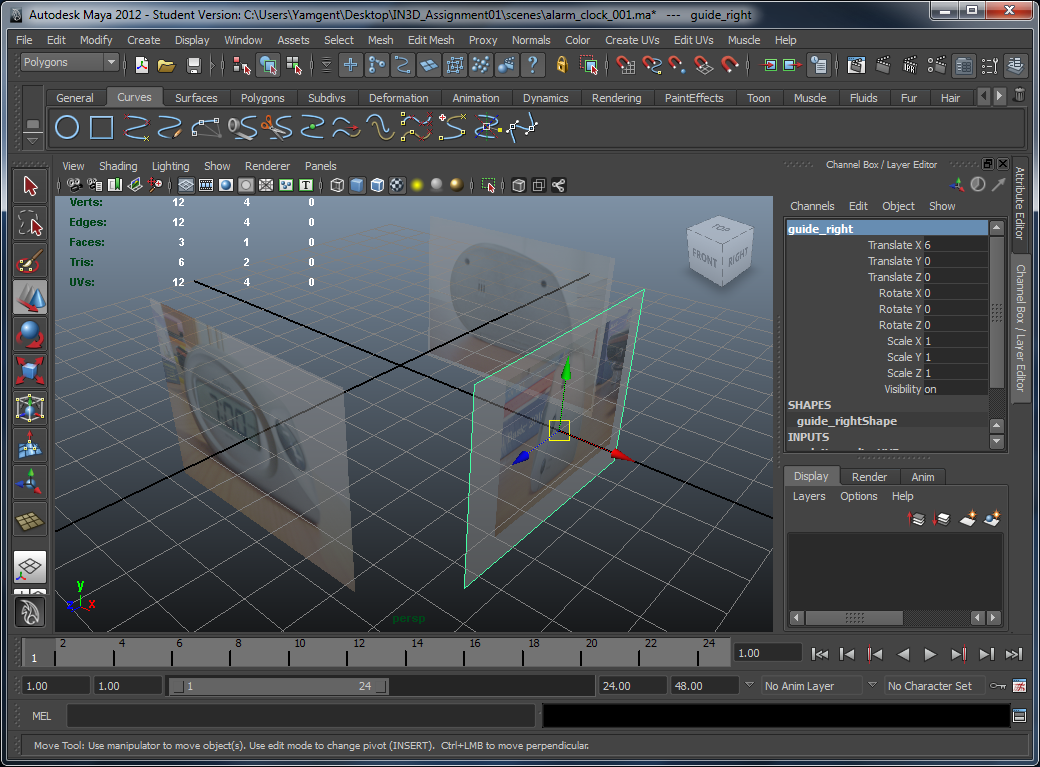
In order to create the guide, I first created polygon planes for each side of the view. After that, I created a new material for each individual plane, so that through the material, I can apply each of the images onto the planes as textures.
Since these planes serve only as a guide, I don't want them to obstruct my view, thus I enabled transparency so that I can see my model when I am modelling.

(click pictures to see the enlarged version)
After I have my images up, it is time to create the cube!
First I created a default polygon cube onto the origin. Then I resized the cube so that it fits to the images.
However, I notice one interesting problem when I resized the cube. Each individual images are taken from different angles and different distances from the camera, so the image of the clock from one of the view may end up being smaller than from another view! Therefore, I fixed them by scaling the images individually so that all the images display a consistent size of the clock regardless of which image I looked.
After the resizing was completed, I played around with the cube's subdivision. I am not sure how much subdivisions I will need, but I eventually settled for this:

(click picture to see the enlarged version)
With the subdivisions in place, it is finally the time to move the vertices of the cube so that they matched the outline of my alarm clock. I took some time to do this but I eventually got the shape right. This is how the shape looks like in the front orthographic view:

(click picture to see the enlarged version)
And at the end of the day, after several moving and adjustment, this was how the was-once-cube look like:

(click picture to see the enlarged version)
(If you have realized, I have moved the image guides around the place. I needed to select the alarm clock outline, and sometimes the guides just get in the way, so I have no choice but to move them. Thankfully, orthographic views don't take into account depth, so the guides appears to remain at the same position even when I move them depth-wise.)
When I got this final result, Step 1 was finally completed. I saved the model and called it a day.
Reflection
Despite the fact that it sounds so simple on paper, this step actually took 2 hours to complete, which I was very very surprised! Maybe that was because most of the time was spent moving the vertices around. I find it rather difficult to adjust them because it always never turn out to what I wanted, so I keep trying and all, but I eventually settled on the one shown above.
In my opinion it still wasn't perfect. However, I managed to convince myself that this was the best one by far by applying the Smooth tool onto it. Yes, I am supposed to use the Smooth tool at a later Step, yet it was kind of hard to know whether this will turn out fine or not in the end so I have to try the tool once anyway.
In fact, I like the outline that have the Smooth tool applied I wondered whether I should bring forward the step for applying smoothness to the object or leave it to a later stage. Oh well, have to make a decision before I continue the next step next time.
I stopped right after Step 1 in order to continue my other assignments and work.
Good and clean workflow. Well researched.
ReplyDelete